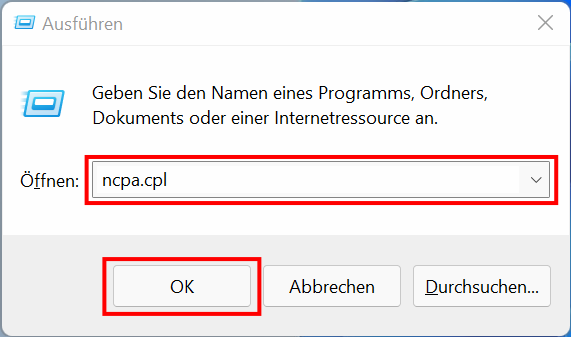
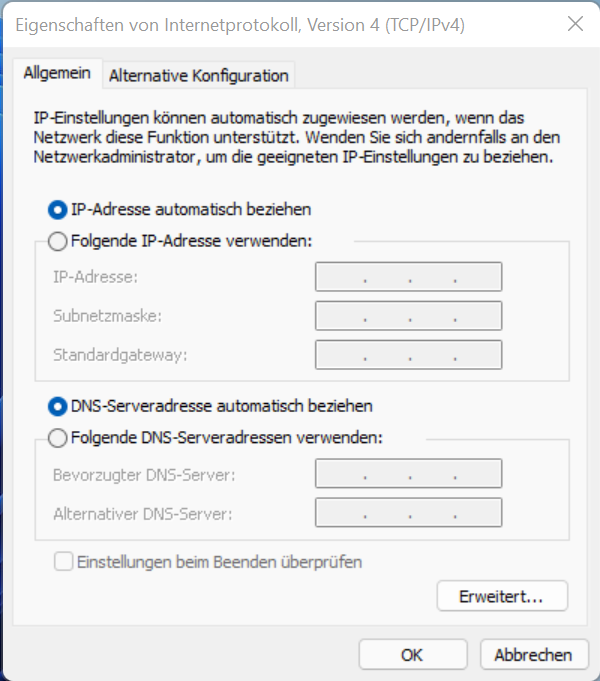
So stellen Sie sicher, dass Sie Ihre IP-Adresse automatisch zugewiesen bekommen.
1
2
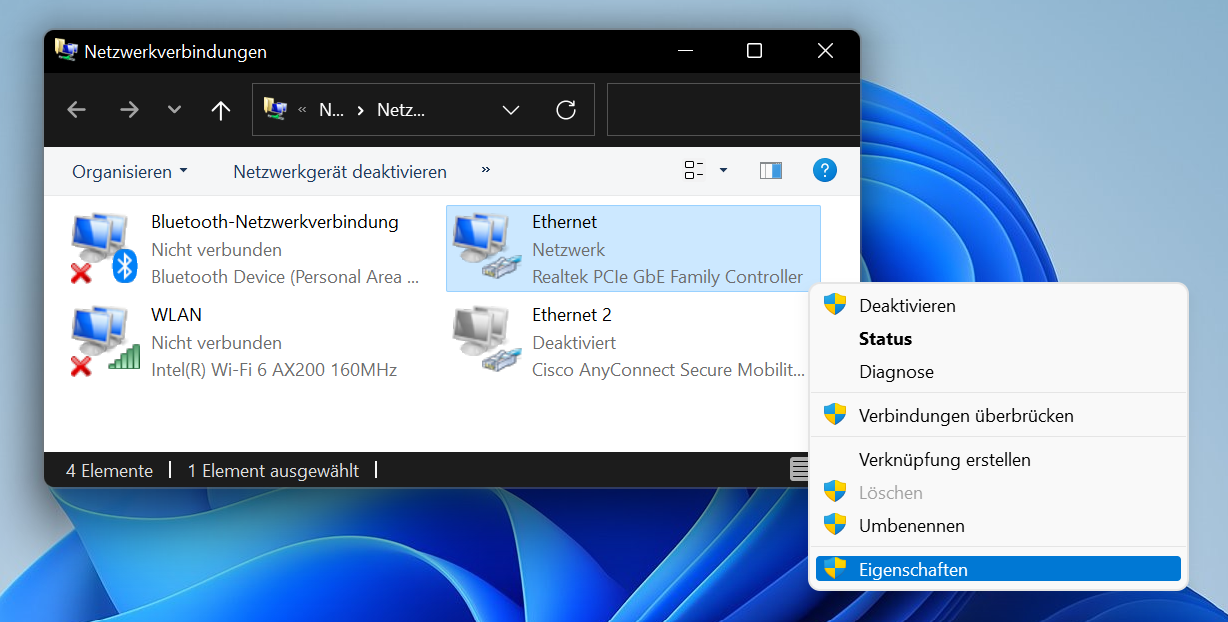
Ändern Sie keine Einstellungen beim Cisco AnyConnect Adapter!
3
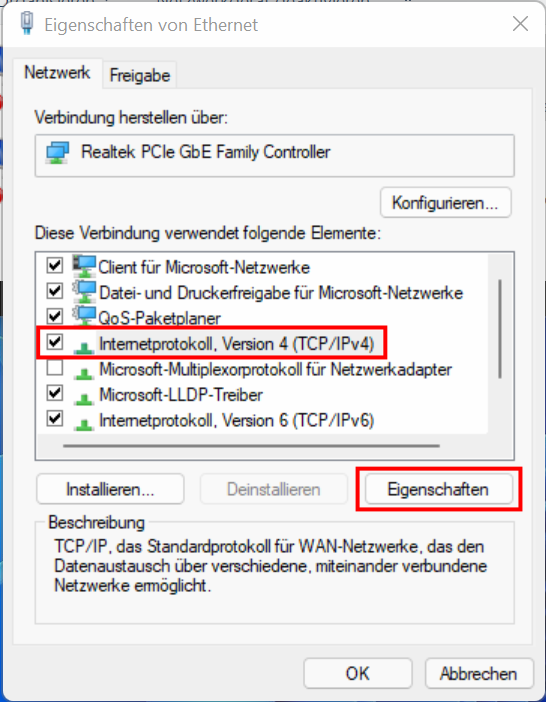
Verändern Sie nicht die Haken vor den Listeneinträgen - markieren Sie nur den benötigten.
4
Wenn dies der Fall ist, so ist dieser Netzwerkadapter bereits auf DHCP konfiguriert und Sie müssen nichts verändern.
5
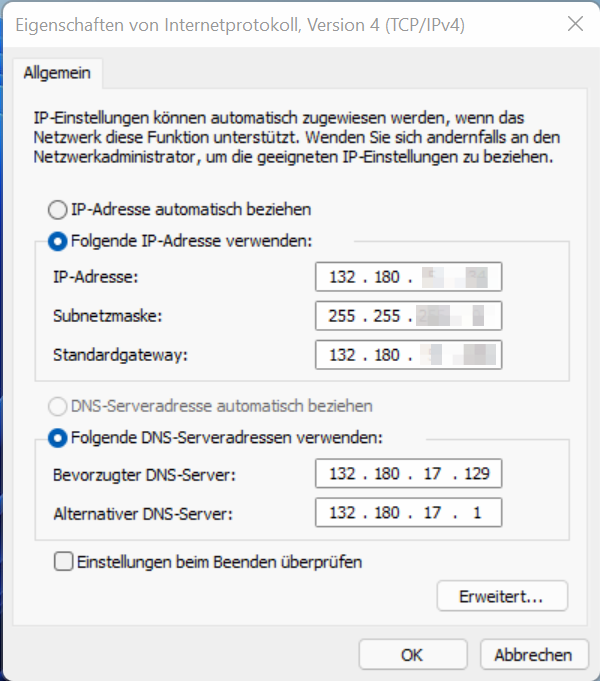
Notieren Sie sich hierzu die IP- und DNS-Einstellungen oder erstellen Sie einen Screenshot.
6
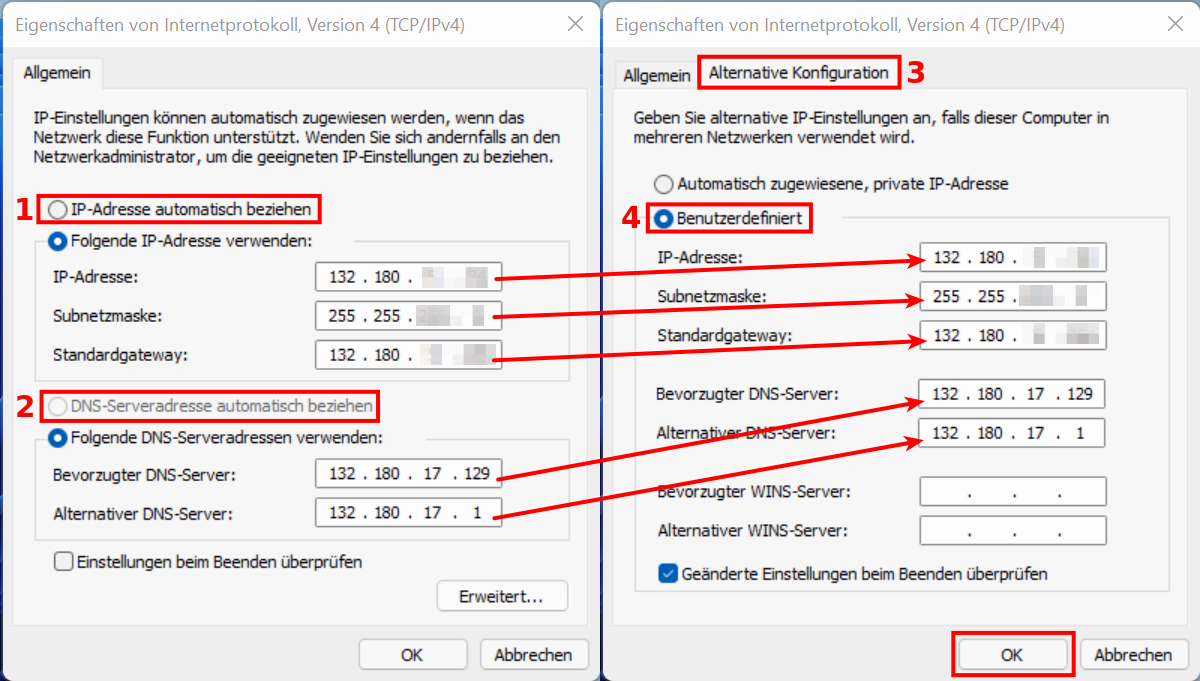
Oben erscheint nun ein Reiter Alternative Konfiguration, in die Sie die vorher notierten Daten wie im Screenshot dargestellt übertragen können. Bestätigen Sie anschließend mit OK.
7
Dies bedeutet, dass Ihr Gerät ab sofort bei jeder Verbindung zunächst für einige Sekunden versucht, eine Konfiguration per DHCP abzurufen. Schlägt das fehl, fällt es auf die feste Konfiguration zurück.
Das hat den Vorteil, dass Sie die Einstellungen nicht jedesmal manuell ändern müssen.
Sagen Sie uns die Meinung - hat alles geklappt?
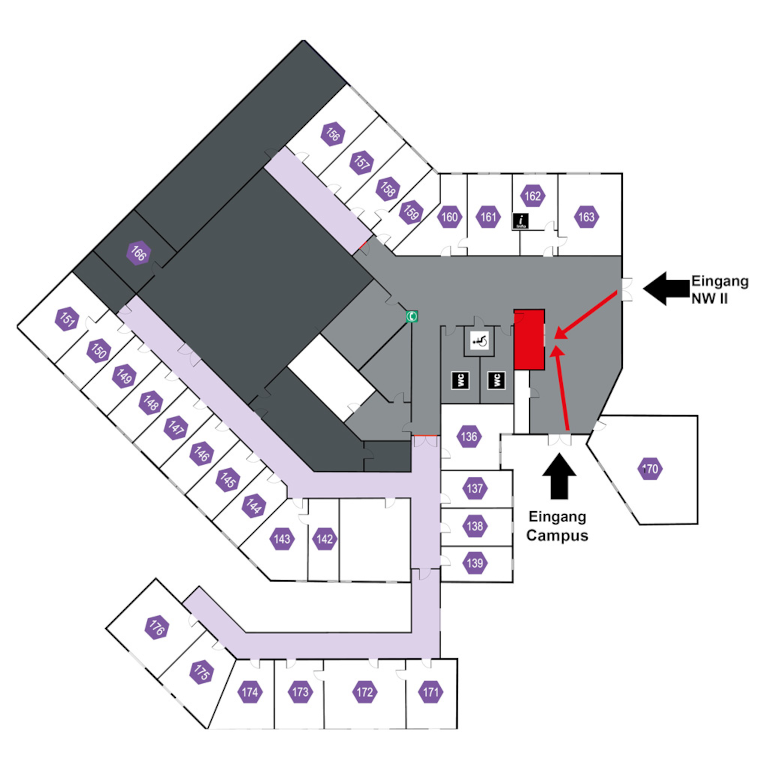
Laptopsprechstunde
IT-Servicezentrum Raum 3.2.U1.131 (Schalter im ITS Flur)
Öffnungszeiten: (ganzjährig, außer während der Weihnachtsschließung)
Mo-Fr 08:30 - 11:00 Uhr
Mo-Do 13:30 - 15:30 Uhr
Keine Terminvereinbarung erforderlich!
Mail: laps@uni-bayreuth.de